Payment Tasks
The following sections provide step-by-step guidance for common payment tasks in ConcordLink. ConcordLink does not store credit or debit card numbers directly, it uses a tokenization process so that no confidential card details are ever accessed or stored by the system.
Viewing payment information
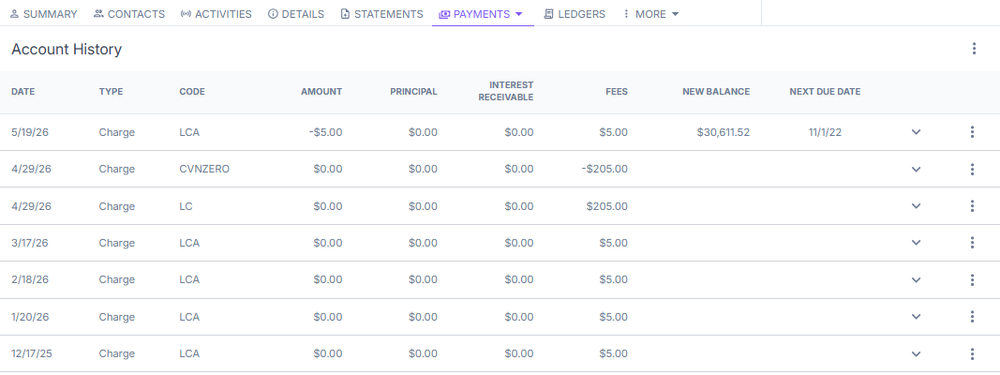
Viewing payment history
- Open the obligor's account.
- Navigate to the Payments or Account History tab.
- Account history displays a full chronological record of all payments, adjustments, and account changes.
- Expand each entry to see which ledgers were affected by that payment.
Viewing a loan's current balance, interest rate, and terms
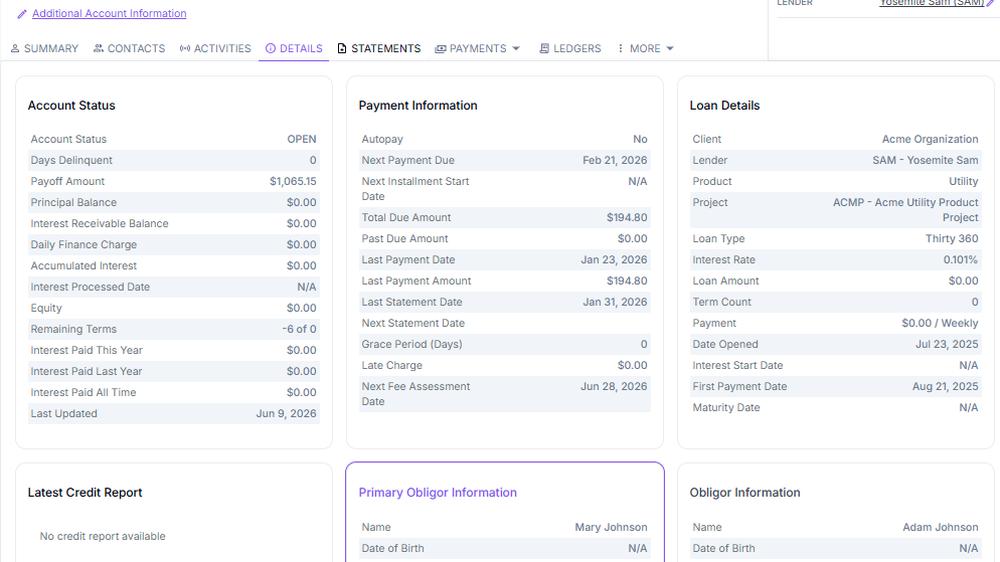
- Open the obligor's account and navigate to the Details tab.
- View the principal balance, payoff amount, daily interest/finance charge, interest rate, payment information, and full loan terms.
Viewing scheduled payments or due dates
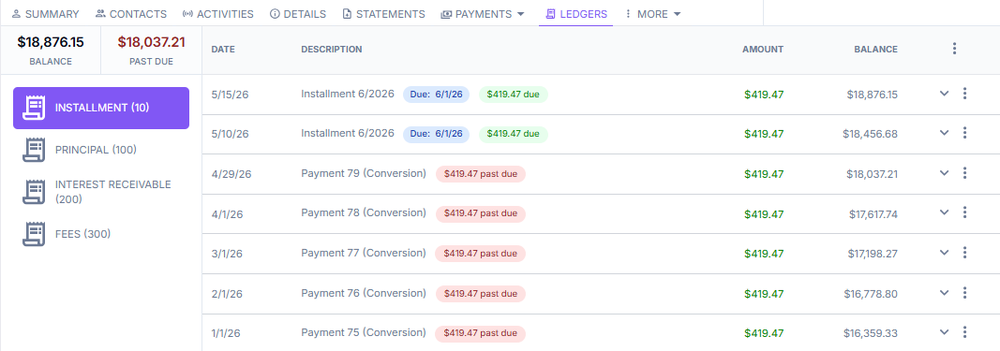
- Navigate to the Ledgers tab and open the installment ledger.
- View upcoming due dates and scheduled installments.
Adding a payment method
- Navigate to the customer's obligation and confirm the correct account by verifying the account number, name, and account details.
- Go to the Payments tab in the obligation's navigation bar.
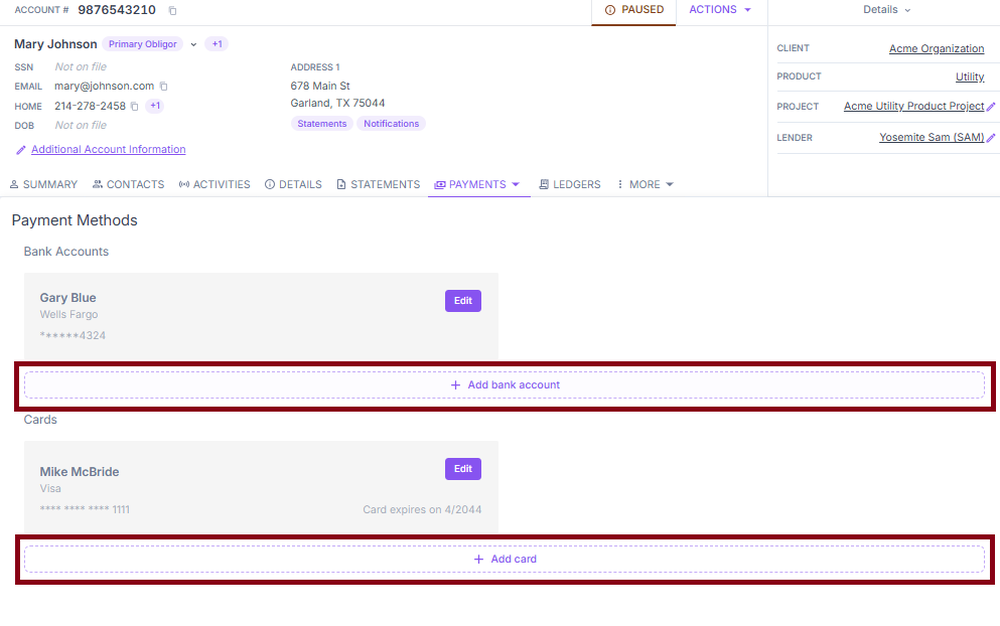
- The Payment Methods page displays the allowable payment methods for that portfolio. ACH (bank account) and card (credit or debit) sections are each enabled or disabled per client configuration.
- Add a bank account or credit card and save.
Autopay
Autopay enrollment is visible on the Summary and Payments tabs. If autopay is active, the payment schedule, amount, and payment method display here.
Lenders can restrict autopay to specific card types: debit only, credit only, or both. If a customer selects a card type that is not permitted for autopay on their portfolio, the autopay enrollment flow will not offer that option. Cards already enrolled in autopay before a restriction is applied are grandfathered in and continue to draft normally. Confirm the allowed payment method types for the portfolio before setting expectations with the obligor.

Setting up autopay
- Open the obligor's account and navigate to Autopay or Recurring Payments.
- Select Set Up Autopay or Enroll in Autopay.
- Choose a payment method type: checking account (ACH), debit card, or credit card. Only the card types enabled for autopay on this portfolio will appear as options.
- Confirm the autopay draft date. The system automatically defaults to the contractual due day, but an alternative Day to Draft is also available.
- Review all details carefully, then select Save or Confirm to activate autopay.
Deactivating autopay
- Open the obligor's account and navigate to Autopay or Recurring Payments.
- Locate the active autopay enrollment and select Deactivate, Cancel Autopay, or Remove Autopay.
- Confirm the action when prompted and verify the autopay status now shows as inactive or cancelled.
- Document the account with the reason for deactivation.
Accepting a payment
- Locate and open the customer's account and verify the obligor's identity.
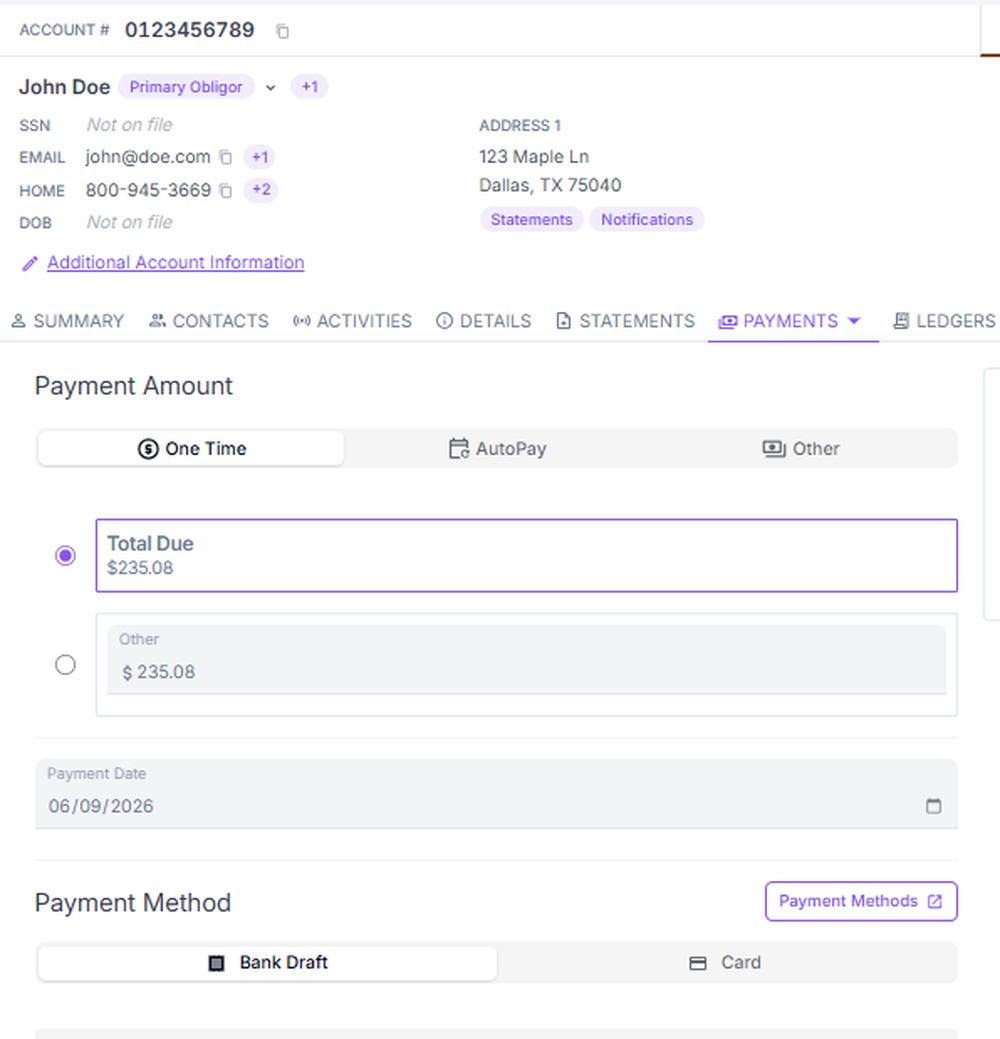
- Navigate to Payments and select Make a Payment.
- Select the appropriate payment type, enter the payment amount and effective date, choose a payment method, and submit.
| Payment type | Steps |
|---|---|
| Regular monthly payment | Select Regular Monthly Payment. The system pre-fills the standard monthly amount and includes any outstanding late fees. Confirm the payment method and effective date, then submit. |
| Payoff payment | Generate a payoff quote first, then submit the exact payoff amount through the Make a Payment workflow. Confirm the effective date matches the quote date before submitting. |
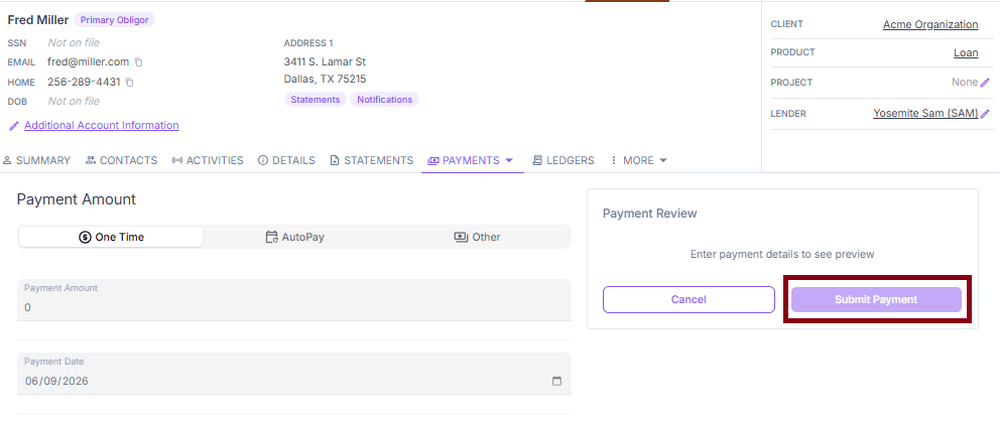
Where sales tax applies, the applicable sales tax is shown as a line item on the payment preview before the payment is submitted, so both you and the obligor can see the tax portion of the total.
Card convenience fees
When a portfolio charges a card convenience fee, that fee is itemized on the portal payment review screen before the obligor confirms the payment. The base payment amount and the convenience fee appear as separate lines that add up to the total.
ACH files and obligor names
ACH files generated by ConcordLink automatically sanitize obligor names to strip characters that some banks reject. This prevents batch-level rejections caused by unusual characters in an obligor's legal name. No agent action is required. The sanitization runs on every ACH file at generation time.
Canceling a scheduled payment
Authorized users can cancel a payment that has been scheduled but not yet processed. Up until the time a scheduled payment is selected for processing, it can be canceled.
- Navigate to the obligor's Payments tab and locate the scheduled payment.
- If the payment is still pending processing, a Cancel Payment option will appear next to the payment details.
- Select Cancel Payment, confirm when prompted, and verify the payment no longer appears as scheduled.
- Document the account with a note explaining the reason for cancellation.
Reversing a posted payment
- Navigate to the obligor's Account History tab, locate the posted payment to be reversed, and open its details.
- Select Reverse Payment.
- Enter the reason (for example, bank return or refund request) and submit.
- Verify the reversal is reflected in the account balance and payment history.
- Document the account with a note explaining the reason.
Waiving fees
The Waive Fee option is accessible directly from the Fee ledger. Navigate to the Ledgers tab, open the fee ledger, and use the Waive Fee option next to the applicable fee journal entry.
- Navigate to the account and open the Ledgers tab.
- Open the Fee ledger and locate the fee to be waived.
- The system evaluates eligibility based on client rules (for example, no waiver if a late fee has already been waived within the configured window).
- Select Waive Fee next to the applicable journal entry, enter the amount to waive, and select the reason (for example, hardship or goodwill adjustment).
- Submit the change, verify the fee balance has been reduced or cleared, and document the account.
Generating a payoff quote
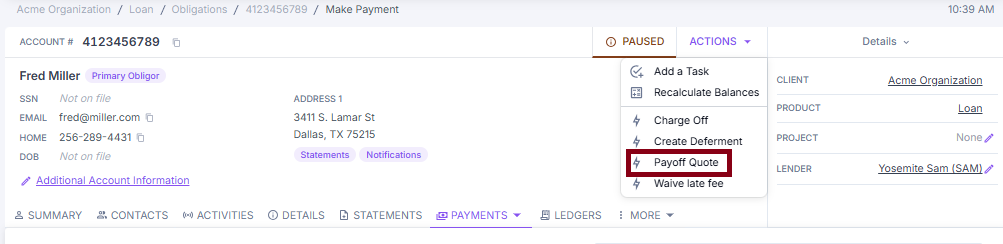
The payoff quote feature allows you to quote the payoff amount with an "as of" date. You may order the Payoff Quote letter or quote the payoff verbally without generating a document.
- Navigate to the customer's obligation.
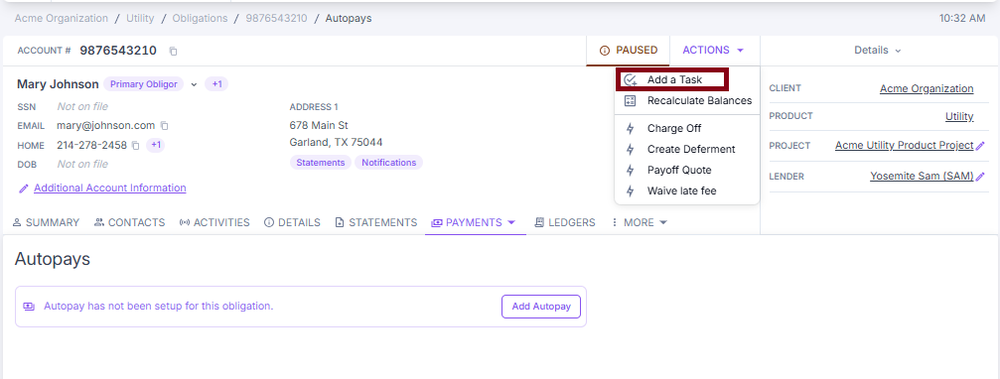
- Select the Actions dropdown in the top-right area of the obligation header.
- If balances appear outdated, select Recalculate Balances from the Actions menu first.
- Select Order Letter, Payoff Quote to generate the payoff quote.
Processing refunds
To process a refund, use the Reverse Payment option in Account History. This allows the refund to be returned via the original payment method (ACH or credit/debit card). If the original payment was made by check, a refund check can be requested. If you are unsure which refund approach to use, escalate to an administrator.
- Open the obligation and navigate to Account History.
- Identify the payment to refund and open its details.
- Select the refund option available on the payment record.
- Select the refund method (original payment method, or check if the original was a check payment).
- Confirm the amount and submit.
Customer payment disputes
- Pull the full payment history and transaction log and review it with the obligor.
- Check the audit trail to verify all payments, fees, and adjustments that have been applied.
- Confirm whether any recent modifications, deferments, or fees caused an unexpected balance change.
- Provide the obligor with a detailed account statement to support the explanation.
- If the dispute cannot be resolved at the agent level, escalate to an administrator for further review.
Using the Actions menu
The Actions menu provides access to critical account-level tasks such as adding tasks, ordering letters, requesting payoff quotes, creating deferments, and more. Available options vary based on the account's status and the agent's permissions.
Creating a task
- Select Add a Task from the Actions menu.
- Add a note with details of the task and save.
- Assigned tasks appear in the task drawer, which can be accessed from any screen using the document-with-checkmark icon in the top navigation bar.
- Tasks can be marked complete, viewed, edited, or discarded from the task drawer or the full-page task screen.
Task creators receive email notifications on task lifecycle events. Whoever created the task is emailed when the task is completed or reassigned. Overdue tasks are batched into a once-daily digest to the creator rather than a per-task email, so expect one summary email per day covering all of a creator's overdue tasks.